FundAnalyser Introductory Guide
Written By Tek Chung
Last updated Over 1 year ago
For day-to-day support:
Please contact Diane Sammy (IA Head of Statistical Data) and her team for any support and data queries.
For product feedback:
Please submit product improvement suggestions at https://fundanalyser.featurebase.app/.
Thank you for using our new FundAnalyser system. You will have access to all of FundAnalyser’s capabilities
Please submit all your feedback and suggestions on https://fundanalyser.featurebase.app/ . Single Sign-On is enabled so you can login with your FundAnalyser credentials. Your identity will be anonymous to non-admin users of the feedback tool. Your feedback will help shape the future of data in the asset management industry.
The following guide details the core functionality FundAnalyser offers, but feel free to explore further once you are more confident with the system.
Account and login
We are conducting beta-testing on the test environment: https://test.fundanalyser.org/
You should receive an email from Fundipedia to set up your account and password.
You’ll see this screen when you first login to FundAnalyser.
Data consumers – Industry Reports, static reports
Use Case 1: View own static data
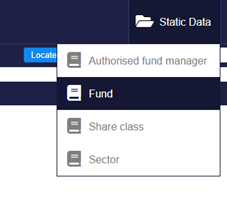
On the top menu, hover over the “Static Data” tab and this should bring up a drop down of all the static data tables you have access to.
Click on “Fund”. This will bring up a list of your own funds.
Expand and use the filters to find a fund of your choice.
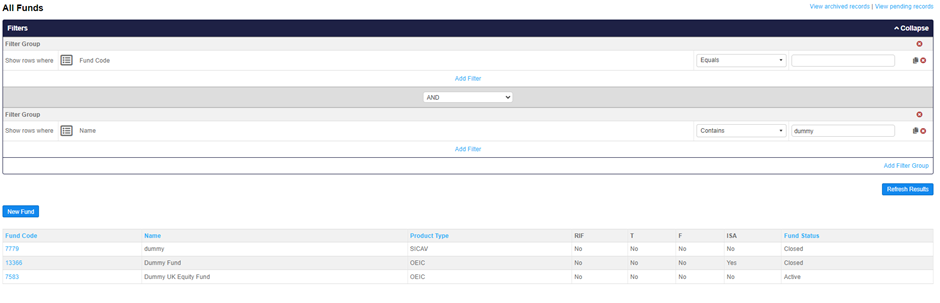
Click on the hyperlinked fund code to enter the record UI.
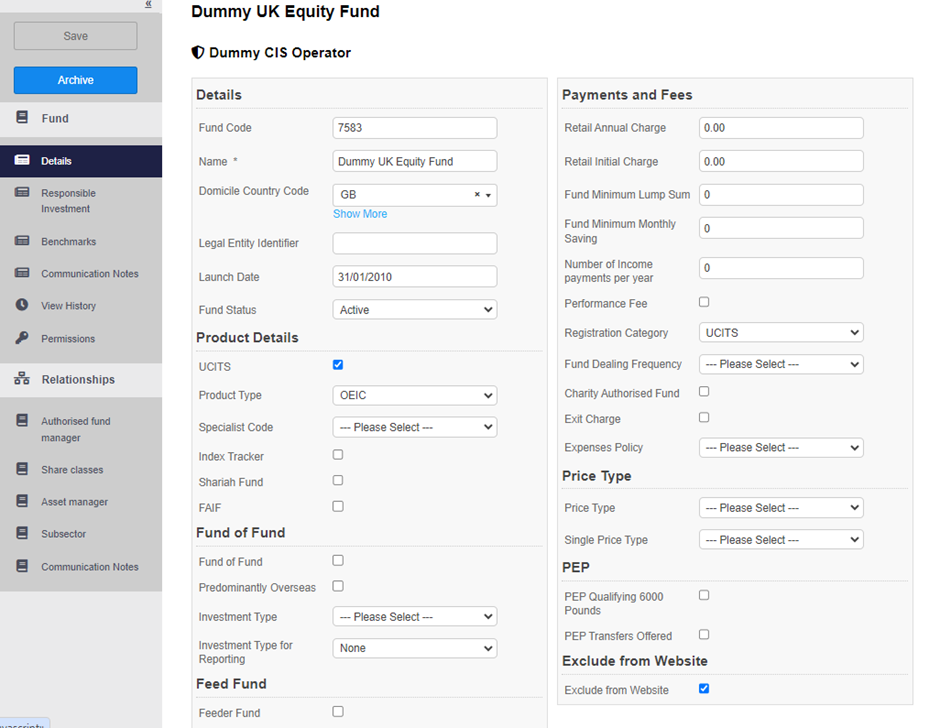
The left side menu shows different pages of fields, as well as relationships to the fund.
You may make changes to all the fields that you have access to. These changes will not be applied and published until IA admins have reviewed and approved them.
Use Case 2: run a system report
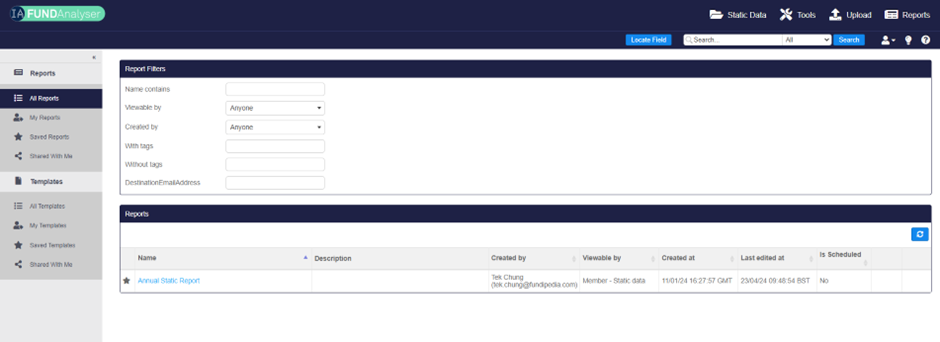
Hover over “Reports” on the top menu and click on “Industry Reports”
You should see the following screen, with pre-set system report. If you cannot see it, ensure the “Show System Reports” toggle is enabled. The idea is that IA admins can create commonly used report templates.
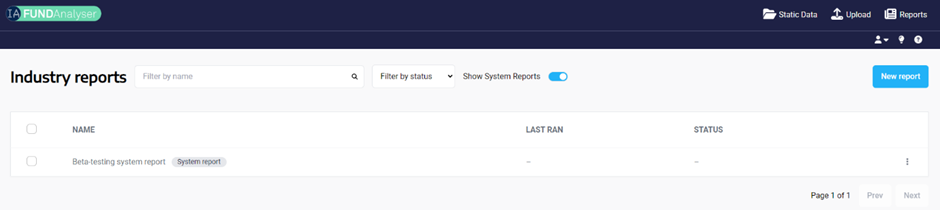
You can run this report by clicking the 3 dots on the right and click “run”. The status will say “Running” and then “Complete”, at which point the file is downloaded automatically. You may be prompted to allow downloads in your browser
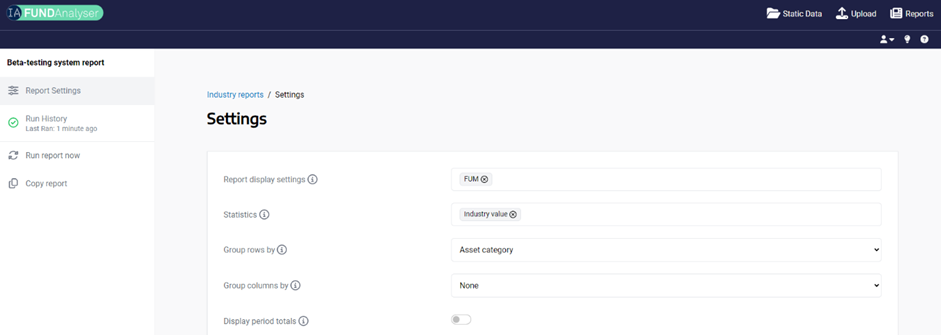
You can also view the report settings by clicking on the report. You may amend the report settings but you will have to copy the report in order to save your changes for future use.
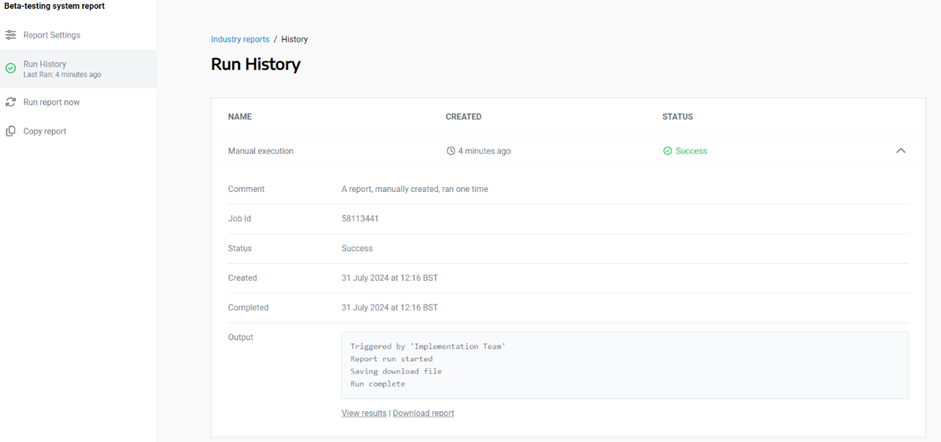
You can also view run history and download a previous run by clicking on the arrow on the right hand side to view run information.
Use Case 3: create and save your own report
Go back to the Industry Reports page
Click “New Report”
Configure your own report settings and filters. Please note that there are certain combinations of settings and filters that have been restricted to prevent unauthorised data disclosure.
Save the report, rename it and run the report. You’ll be able to find all your reports in the “Industry Reports” page.
Please see our Knowledge Base for more information.
Data providers – Data upload, annual static report
Use Case 4: Dynamic data submission
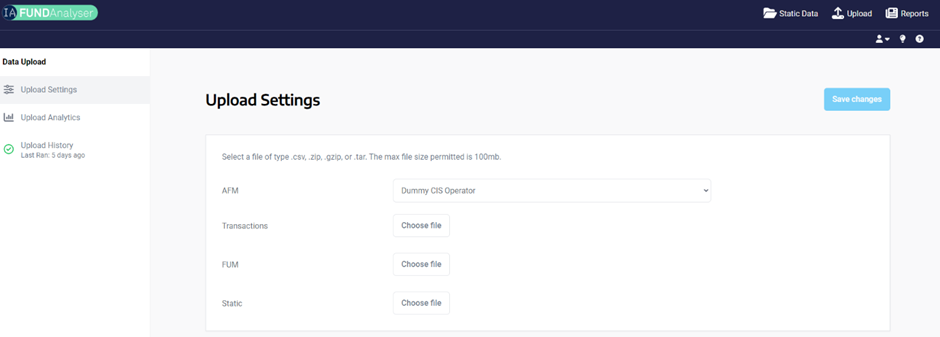
Click on “Upload” on the top menu.
Choose and upload FUM and Transactions files for this month.
There are file name validations to ensure the correct files are selected:
The file name must begin with your AFM code
The file name must contain the text “FUM” or “Transactions”.
The system will read your file to find out the submission period.
You may receive warning messages when some validations have not been passed:
Transactions over 20 million will be flagged with a warning, to be checked by IA admins.
Any bad data will be flagged.
You can go to “Upload Analytics” to see a dashboard view of the statuses of your submission.
If the data submission has been flagged as failed, you can go into “Upload History”, expand the upload information tray, and click “Download output file” to see what the issues are.
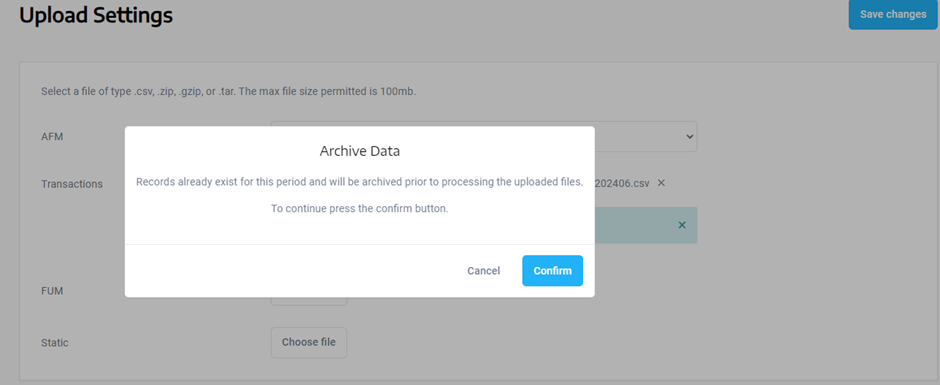
Use Case 5: Dynamic data correction
If an issue has been flagged about your data, you can simply reupload the corrected files on the same “Upload” screen
There will be a confirmation dialogue asking you to confirm you want to archive your previous submission.
Use Case 6: View Annual Static Report
Click on “Reports” on the top menu
Click on “Annual Static Report”.
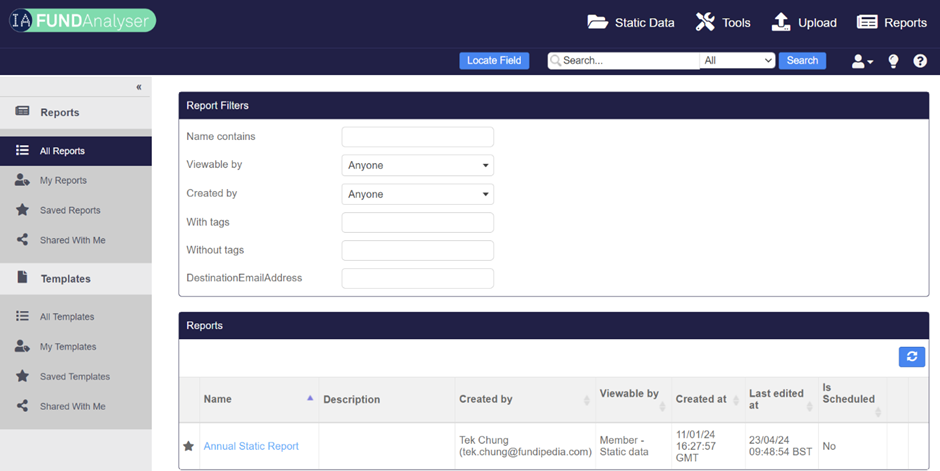
Click “Download CSV” to output a file with all your fund static data.
Use Case 7: Fund static data correction
Navigate to the “Upload” page from the top menu.
Upload new static file.
Check dashboard to see status of validation checks.